Six Traits of Writing
The Ultimate Guide
by Kristina Smekens

Kristina Smekens
Author & Literacy Consultant
About | Connect: ![]()
Educational research states that all good writing includes six key ingredients:
- ideas.
- organization.
- voice.
- word choice.
- sentence fluency.
- conventions.
These are the Six Traits of Writing.
But, as you’ve likely experienced, building stronger writers can seem overwhelming, regardless of the grade you teach. Every classroom includes a broad range of students at varying writing levels. As such, a canned writing curriculum will never meet the unique needs of every student.
That’s why our team believes so strongly in the 6 Writing Traits. It’s not a program. Instead, it is a framework that uses the six qualities of “good” writing to guide every lesson, assignment, and assessment.
If you want to learn what are the Six Traits of Writing, you’ve come to the right place! For nearly 20 years, we’ve been helping educators build stronger writers with the Six Traits. In this guide, you’ll find a comprehensive overview of the Six Traits of Writing. This includes suggestions for implementation in your own classroom.
Let’s get started!
Don’t have time to read this now?
Enter your email address below and we’ll send you a printable version that you can reference later.
Table of Contents
PART 1
Get Acquainted with the Six Traits
What are the 6 Traits of Writing?
The Six Traits of Writing are rooted in more than 50 years of research. This research reveals that all “good” writing has six key ingredients—ideas, organization, voice, word choice, sentence fluency, and conventions.
These key components provide teachers and students with a common understanding for how to compose, revise, and assess all types of writing. They are inherent in well-written essays, reports, blogs, poems, videos, and other genres. And they make up the basis for what are the 6 traits of writing.
All 6 writing traits should be taught throughout grades K-12. They are evident within the products of our youngest writers through pictures, labels, lists, etc. In the upper grades, the traits can be found in all types of writing that occurs in English-language arts. When teachers utilize the Six-Traits language across the K-12 spectrum, it continuously reinforces what “good” writing is.
Many elementary educators have been tempted to divide the traits by grade level and teach only one trait per grade (e.g., First Grade: Ideas, Second Grade: Voice, etc.). But it’s important to bundle all six traits together so that each trait can be reinforced at every grade level. What changes at each grade is the complexity of the skills and the standards by which they are assessed.
As students master skills within each trait, introduce new skills such as:
- point of view,
- theme,
- imagery,
- simile,
- metaphor,
- personification,
- satire,
- hyperbole,
- and more.
Even high school juniors and seniors can work toward mastery with new skills in each trait.
“Trait-based writing provides a common vocabulary for talking about writing.” – Ruth Culham
It’s important to recognize the 6 Writing Traits are not a program. They are simply six words, six characteristics, six ingredients inherent in strong writing. Therefore, this vocabulary integrates easily into any writing curriculum.
Let’s take a quick look at each of the 6 writing traits.
Trait of Ideas
Trait of Organization
Trait of Voice
Trait of Word Choice
Trait of Sentence Fluency
Trait of Conventions
Do the traits align with the standards?
Whether your state follows the Common Core or its own set of academic standards, the expectations for achievement in writing can be found in the Six Traits.
Within the college and career-ready writing standards are dozens of individual skills.


The power of the traits in writing is that they offer a means of collectively grouping many skills together under one umbrella name. (All of the raindrop skills above fall under the Trait of Ideas.)

While the Six Traits of Writing are inherently present in state and national standards and in all curriculums, it can take a critical eye to parse out individual sub skills and tie them to specific traits.
We have taken the time to do just that with the standards listed below. By using these documents as a guide, the process of intentionally tying instruction and assessment to the Six Writing Traits becomes a lot easier.
State Standards Organized by the Six Traits
Is “Presentation” the seventh writing trait?
The additional writing trait (6+1) addresses the presentation of the writing itself. In written pieces, this includes handwriting, penmanship, writing on a line, letter formation, and overall legibility. In digital products, it includes the use of typography, color, graphics, images, proportions, margins, white space, etc.
The trait of presentation deals with the overall visual appeal and look of the product.
Why is it called 6 + 1 and not 7 Traits of Writing?
Although the reader values the final look of the product, presentation does not weigh equally to the Six Traits. The Six Traits in writing identify the ingredients that impact the quality of the message. However, presentation doesn’t have the same impact on the message.
Oh, it’s true, the reader appreciates neat and legible writing. But, beautiful penmanship and a visually appealing layout, does not compensate for weak content.
The opposite is true, as well. A piece with an unusual font choice or a slideshow with distracting colors may give the reader a poor first impression. However, this does not reflect a writer’s ability. The content itself and the quality of that information are separate components.
Presentation differs from the other traits because it does not add to the quality of the message. Therefore, it is not considered to be the seventh trait.
PART 2
Get Started with the Six Traits of Writing
How do I introduce the Six Traits to students?
1. Be Intentional
Set aside 1-2 writing mini-lessons to introduce each trait—that’s 6-12 days total.
Day 1
Introduce
Ideas
Day 2
Introduce
Organization
Day 3
Introduce
Voice
Day 4
Introduce
Word Choice
Day 5
Introduce
Sentence Fluency
Day 6
Introduce
Conventions
2. Be Consistent
Not only do you want to consider the pacing of your introduction but also the common thread. For example, when using a mentor text to introduce the Trait of Ideas, also use a mentor text to define each trait. If you use a song to introduce the first trait, you should use parallel songs to introduce all the other traits. A consistent or patterned approach to the introduction reminds students that the traits all work together.
3. Be Visual
Honor different learning styles. The more visual you can make your writing instruction, the more students you will reach. Consequently, introduce each trait verbally and visually with a purposeful graphic icon.
You can make your own icons, or you are welcome to download the Smekens Education Six-Traits Icons to get started right away. (TIP: When the entire school uses the same icons, students benefit from hearing the same trait language and seeing the same graphics from year to year.)
How do you teach the Six Traits of Writing?
The first days are spent introducing the six “umbrella” ingredients. However, the rest of the year is dedicated to teaching individual “raindrop” skills that fall under each trait and are required by the standards.
The Six-Traits framework comes into play when teachers are intentional about tying each mini lesson skill to the specific trait it falls under.
What to teach after introducing the Six Traits
With procedures in place, writer stamina built, and trait language introduced, now teachers transition into writing units. Whether you organize units into six to nine-week “mother lodes” or break your instruction into mini-units, the secret is to teach students the different purposes and structures of different genres.
Argumentative, persuasive, informative, and narrative writing all include the same 6 writing traits—but they each require different subskills. Remember, your yearlong writing instruction is not focused on “teaching the traits” but instead on teaching small skills within mini-lessons. The traits simply provide a way to organize those skills into logical order, with research-based categories.
- Organization in persuasive/argumentative writing includes a What & Why structure. The introduction identifies the topic or issue and the writer’s opinion, claim, or stance on it. The middle paragraphs then develop the reasons and evidence to explain why.
- Organization in how-to informative writing includes a chronological structure. The introduction identifies the topic or concept, and the body describes the individual steps to achieve it. (NOTE: There are many other genres and text structures for informative writing. This is just a single example.)
- Organization in narrative writing includes a Who, What, & How structure. The beginning introduces the character (i.e., who), the middle reveals the problem (i.e., what), and the end explains how it was resolved.
For primary and ELL teachers, the Six Traits should serve as a foundation as students progress through the developmental stages of writing. The traits are evident in pictorial writing, labeling, listing, and sentence writing. So each writing unit—regardless of the developmental stage—should still include trait-based lessons.
PART 3
Spiral through Trait Lessons in 6 Trait Writing Units
Skills to Teach in a 6-Traits Mini-Lesson
Trait of Ideas mini-lessons
- Knowledgeable writing topics
- Writing for a purpose
- Narrow topic
- Details, development, & elaboration
- Supporting ideas with examples
- Develop plot, characters, setting
- Trait of Organization mini-lessons
Pre-writing & planning
- Beginning, middle, and end
- Like ideas clumped together
- Hook and ending components
- Clear transitions
- Sequential ideas
Trait of Voice mini-lessons
- Writing to an audience
- Reader-writer connection
- Writer’s feelings about the topic
- Voice expressed with type (NO, !!!, yuck)
- Shifting attitudes within a piece
- Perspective
Trait of Word Choice mini-lessons
- Specific nouns (right word, right spot)
- Adjectives (descriptions, 5 senses)
- Action verbs
- Imagery (show, don’t tell)
- Synonyms (varied word choice)
- Adverbs
Trait of Sentence Fluency mini-lessons
- Complete thoughts; complete sentences
- Different sentence beginnings
- Sentence types (.!? simple, compound, complex)
- Varied sentence lengths
- Readability; easy to read aloud
- Figurative language
Trait of Conventions mini-lessons
- Proper use of capital letters
- Paragraph indents
- Grammar & mechanics
- Punctuation (,;—’…”)
- Readable spelling
- Word spacing and wrapping
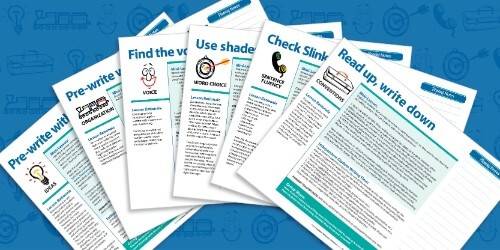
Get Six Free Lessons
Organize your teacher resources by trait
Since every writing skill falls under one of the Six Traits, it makes the most sense to organize your lesson materials and resources by trait—not by writing unit.
- If you are looking to organize digital documents, then establish six folders on your computer—one per trait.
- If you prefer organizing paper-based resources, create an old-fashioned filing system with six folders or a set of six three-ring binders. (We developed Six-Traits mini-lesson labels to adhere to the outside of expandable hanging file folders. Use the list of skills printed on the label as a guide for collecting and organizing trait-based mini-lessons.)
Regardless of the organizational method you choose, house individual lesson plans, resources, and writing samples within their broader trait categories for easy access.
How to deliver a Six-Traits mini-lesson
With this in mind, make it a priority to keep your daily mini-lessons mini—10-15 minutes long.
Best-practice mini-lesson instruction always contains four essential steps.
STEP 1: Introduction
STEP 2: Instruction
More than just telling students what to do, this is when the teacher shares her expert thinking to reveal when, where, how, and why you do it. This personal journey of thoughts accompanies the teacher’s live demonstration of the skill. It’s the pre-planned, one-person monologue, where the expert captions every action being demonstrated. This added component reshapes this teacher-demonstrated portion to include I do, you watch and listen.
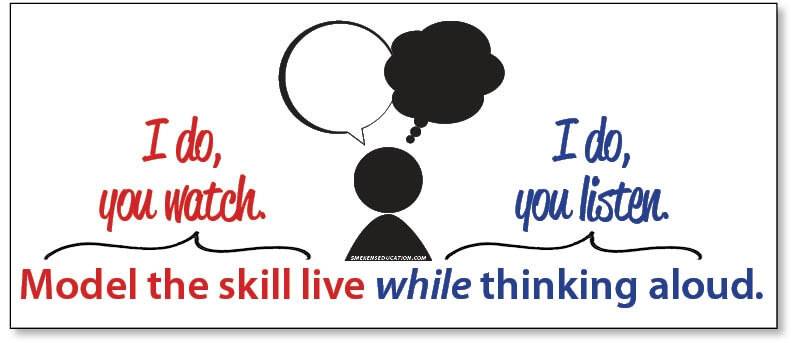
To ensure efficient and effective Think Alouds, apply these tips:
1. Announce lessons will include an I do portion. This is the time where the teacher demonstrates, and students watch and listen. (For those eager to share, remind them not to help you but to assess if they are thinking what you are thinking.)
2. Do not make eye contact with the students. Instead, look above them, beyond them, or through them. This reinforces that the I do is a one-person monologue.
3. Speak in the first person. Rather than questioning What could you do? speak about what I could do. Use only I, me, and my statements during a Think Aloud.
4. Plan out every Think Aloud. Although teachers know how to execute various writing skills, most don’t know how they know how to do it. They just do it!
Since the skill is so automatic, it requires teachers to slow down and carefully consider their thinking process before attempting to teach it to students. If the Think Aloud isn’t planned out ahead of time, it’s easy to overgeneralize the process and return to telling and cease truly teaching.
The Think Aloud portion of a lesson provides the explicit teaching students need. It showcases an expert’s thinking while students watch and listen.
STEP 3: Interaction
Although this interaction step includes student participation, it’s important not to lose control. Rather than calling on individuals during the mini-lesson, engage all students with opportunities to think through the skill. Use code phrases like “Turn & Talk” and “Back to Me” to let students know when to pool their thinking with a peer and when to return their attention to instruction.
The challenge of getting every student involved in the learning is not a new one. The fact of the matter is, some students don’t have the desire, the confidence, or the skill set to actively participate collaboratively.
During our professional development for teachers, we have long encouraged the “Turn & Talk” strategy to engage students in peer collaboration as they respond to a question prompted by the teacher. However, this procedure needs to be taught, practiced, and fine-tuned.
The “Turn & Talk” and “Back to Me” code phrases are essential ways to manage time and increase engagement during a mini-lesson. They allow for all students to experience 2-3 examples orally, which is significantly better than only 2-3 students each experiencing a single written example at the board.
STEP 4: Closure
Step 4 closes the mini-lesson and sets students up for a response activity. After the I do (Step 2) and the We do (Step 3), it’s time for the You do (Step 4). Identify what you want students to do with the skill on their own. While writing today, I’d like you to. . .
Remember, the students don’t get better during the lesson—it’s after the lesson when they practice the skill that they improve their abilities. Consequently, keep the lesson short.
How do I make trait-based writing lessons more engaging?
Boost engagement with concrete triggers
Increase student engagement during a Six-Traits mini-lesson by incorporating a trigger. Not only do visual aids add a level of energy and excitement, but they also help students remember the purpose and function of specific writing skills.
Then, with that knowledge, brainstorm an object in the real world that functions similarly.

FREE RESOURCE
The Power of Physical Triggers
For example, when teaching students to write about a narrow topic (or focused thesis statement), the goal is to show them how to go from a large, broad subject to something smaller, more finite. It’s all about shrinking the topic.
Everyday items that get smaller are Russian stacking dolls, Tupperware, and nesting boxes. Reveal one of those objects within the lesson to demonstrate how a large subject can be narrowed down to a smaller, more focused topic.
Integrate mentor text
Step 2 of a mini-lesson often includes revealing examples of the skill in action. Although workbooks and worksheets include examples, they are typically contrived and formulaic and lack the quality and sophistication of authentic sentences.
- Consider sharing picture books with your students to demonstrate a specific trait. Even middle school and high school students enjoy picture books!
- Look for excerpts from chapter books and novels that exemplify a specific writing skill.
- Collect authentic text (e.g., newspaper articles, websites, cartoons, etc.) to show students that current trends in writing include the traits in writing.
- Use student anchor papers to convey what “good” writing looks like for a specific assignment.
Do I teach a new skill every day?
No, you do not teach a new skill every day. You teach a mini-lesson every day, but the same skill will be taught across multiple days.
Teach one skill across 3+ days
Students don’t learn everything in a single 15-minute mini-lesson. Consequently, plan multiple mini-lessons to teach a specific skill. This requires slowing down instruction—and expectations. Provide opportunities for students to first recognize the skill in mentor text before expecting them to try it and apply it within their own writing.

FREE RESOURCE
Mini-Lesson Planning Template
DAY 1
First, reveal excerpts of authentic text where the skill appears. Think Aloud about how the excerpt impacts the reader’s comprehension. This is the concept of Notice & Name It. If students don’t recognize the skill in action, then they can’t apply it intentionally.
DAY 2
The first mini-lesson focused on studying the skill as a reader. Day 2 transitions to Try It as a writer. Instruction must include the teacher modeling how to return to a previous draft and insert the skill in context. This will again require Thinking Aloud during the lesson.
Students must hear how an expert discerns when, where, and how to incorporate the skill within his own writing.
DAY 3
The third day of a mini-lesson series transitions to lifelong acquisition. Teach students how to incorporate the skill while composing a first draft (rather than as a revision technique as practiced the previous day). This kind of instinctive application demonstrates mastery.
PART 4
Provide Trait-Based Feedback
One of the most powerful aspects of the Six-Traits language is its application beyond instruction. Provide writers with clear feedback within formative assessments and daily conferences utilizing the same six ingredients of good writing.
How do I use the Six Traits to offer feedback?
Engage in trait-based writing conferences
Literacy expert Carl Anderson has done extensive work in the area of writer conferencing. He claims that conferring with students is a teacher’s most crucial writer’s workshop role. This type of formative assessment reveals the skills students are mastering but also what they need next instructionally.
Conferring with students is nothing new, and most teachers agree on the benefits of conferencing. However, this facet of writing can often be grueling for teachers. It’s important to understand that there are different types of conferences that each serve a unique purpose.
Product Conferences
The notion of conferencing often includes a long, laborious meeting with one student at a time at a separate table or at the teacher’s desk. Such a conference is called a product conference as the teacher will spend 15-25 minutes with an individual student going over all parts of his piece.
The advantage of this meeting is that the teacher can point out numerous strengths and numerous areas for improvement in preparation for a final draft. While spending all this time with one student is powerful, the other 25 kids lack teacher feedback and support for a long time.
Although these types of conferences are important, product conferences should happen infrequently. Plan to conduct them only about three or four times a year in preparation for publishing a piece. In between, converse with students via frequent process conferences.
“We are not editors, but teachers. The goal of a conference is to help students become better writers.” – Carl Anderson
Process Conferences
Students need feedback during all stages of the writing process—not just during the final revision and editing stages. Unlike the longer product conference, a process conference lasts only a few minutes, and it can happen at any stage in the writing process. Teachers may sit down with students and talk about choosing a topic or discuss their pre-writing plan or give feedback as they draft a new piece or when they’re fine-tuning it.
Students would rather have a few minutes of teacher feedback regularly versus 20 minutes once a month. They need to be in touch with the teacher more often, but they do not necessarily need to be one-on-one. Leading a process conference with small groups of students allows more students to receive feedback more often.
Group process conferences allow teachers to touch base with more students each day and provide a critical, formative assessment of where students are and what they need next.
Provide students with compliments & comments
PART 5
Build Six-Traits Writing Rubrics
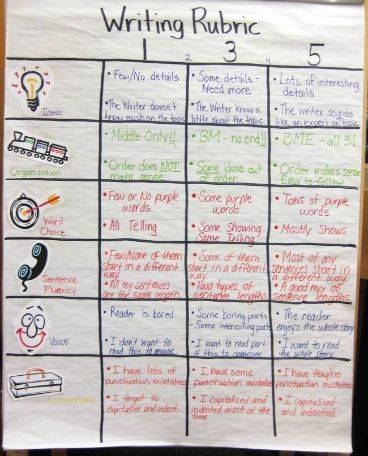
Build a kid-friendly Six-Traits writing rubric
Often teachers draft a rubric on their own and then “go over” it with the kids. However, with this approach, students have little ownership and may not understand some of the rubric language.
Consequently, create a writing rubric with your students. Since the criteria and language are generated by the students, this ensures that it’s a kid-friendly assessment tool. Furthermore, this method honors the education research.
- HIGH: Work together to describe what each trait looks like within a “good” one.
- MIDDLE: Then, consider a “pretty good” writing piece—one not as strong as the HIGH but not LOW either. This MIDDLE level must include parallel criteria described in the HIGH level.
- LOW: Repeat this process describing the qualities and characteristics of a LOW-level product.
Provide individualized feedback using the rubric
With a kid-friendly Six-Traits rubric, you can provide students with individualized feedback on their writing. But contrary to popular belief, providing precise feedback to student writers does not have to involve an all-encompassing critique with the red pen. After creating/updating the rubric with students, use this tool to do the majority of the work. Accompany each piece of writing with a copy of the rubric.
After creating/updating the rubric with students, use this tool to do the majority of the work. Accompany each piece of student writing with a copy of the rubric.
- Instead of writing Add more detail or Fantastic verb choice in multiple places on the student’s draft, simply highlight those criteria within the rubric.
- Next to the highlighted criteria, include specific words or paragraph numbers the comment pertains to.
- Using the annotated rubric, students apply your customized comments and compliments in revision.
This approach helps teachers transition from simply fixing student writing to focus on building writers.
Use a Six-Traits writing rubric to assign grades
This same kid-friendly analytic Six-Traits rubric can be used to generate grades as well. However, it’s important to adhere to these three guiding principles:
1. NO ONE CAN FAIL ON THE RUBRIC. Students earn a failing grade if they do not attempt the assignment (i.e., do not turn it in). However, submitting a product must qualify them for at least a D-. If a weak attempt is valued the same as no attempt (i.e., failing), then many students stop trying. Therefore, the lowest score on the rubric, a Level 1, needs to be within a passing range (e.g., 60% or D-).
2. HONOR THOSE WHO GO BEYOND THE GOAL. Include at least one level that describes a product that knocks your socks off. Have an A level (Level 4), but then have an exceeding or A+ level (Level 5).
3. DON’T WEIGH TRAITS EQUALLY. Depending on the piece, different traits are emphasized. If students are only writing a first draft, then conventions would likely weigh less than the traits of ideas and organization.
However, in poetry, word choice and sentence fluency might be valued more. Identify the traits you want to score and the point value that coincides with where you spent your instructional time.
Regardless of which traits you are scoring and/or emphasizing, be sure to communicate this information to students before they write. Remember, they are trying to shoot at a target, so clearly define what it is.
Convert Six-Traits rubric scores to a grade
When it comes time to convert a rubric score to a grade, avoid the temptation to simply add up the levels as if they are points. Instead, use the Smekens Six-Traits Rubric Calculator with any 5-point rubric of your choosing.
How to use the Six-Traits Rubric Calculator:
1. Identify which traits you want to score.
2. Determine the value you want to give each one
3. Read a student’s piece.
4. Click each individual trait score based on rubric criteria.
5. Click to calculate the earned grades, points, and percentage for your grade book.
FREE TOOL
Six-Traits Rubric Calculator
How do the 6 Traits of Writing fit within state writing rubrics?
The power of the Six-Traits writing framework is its universal application to every grade level, writing genre, and student writing assessment. Although ideas, organization, voice, word choice, sentence fluency, and conventions are the essential traits that are embedded in all state and national testing rubrics, they are not necessarily labeled by those names.
In order to see the traits within a rubric, you have to study the criteria and ask, “What trait does this skill impact?” For example, in the rubrics below, the criteria has been color-coded to identify which writing expectations fall under which of the six traits. Notice the heavy emphasis on the trait of ideas (blue) and organization (green). These two colors bleed all over every rubric because as “trump” traits, they make the biggest impact on the overall student writing.
Six Traits within state writing rubrics
PART 6
Understand the Research Behind the Six Traits
Where did the traits come from?
In the 1960s, a researcher named Paul Diederich asked a group of professionals to identify what makes writing effective. He received hundreds of responses, ranging from strong metaphors to correct semicolons. But no one can remember hundreds of things simultaneously, so Diederich grouped the responses and found they fell within six categories.
In 1984, literacy expert Vicki Spandel led a team who replicated Diederich’s study. In the end, Spandel, curriculum experts at the Northwest Regional Education Laboratory, and willing teachers from Missoula, Montana and Beaverton, Oregon all settled on the same six ingredients.
Since that time, the research has been formally conducted a third time. Using an even wider variety of writing genres, including digital and online writings, Education Northwest has proven that the same six ingredients are still the core of “good” writing.
The Six Traits of Writing model is now used in all 50 of the United States as well as multiple countries around the world.
Traits Writing: The Gold Standard of Writing Instruction and Assessment
Written by Lois Bridges, Ph.D.
An Investigation of the Impact of the 6 + 1 Trait Writing Model, December 2011
Conducted by: U.S. Department of Education, Institute of Education Sciences, National Center for Education Evaluation and Regional Assistance
For the confirmatory research question (What is the impact of 6+1 Trait Writing on grade 5 student achievement in writing), use of the 6+1 Trait Writing model caused a statistically significant difference in student writing scores.
PART 7
Implement the Six Traits School-Wide
When a K-5 school, for example, commits to Six-Traits implementation, students at every level are exposed to age-appropriate mini-lessons, mentor text, anchor papers, and writing rubrics—all of which are intentionally tied to the Six Traits. That consistent exposure to the same elements over a period of years strengthens students’ depth of knowledge but also their capacity to apply the traits in writing. This includes persuasive, argumentative, informative, and narrative pieces.
Such repeated exposure requires more than a poster and six words. It’s about the daily and explicit teaching of dozens of granular writing skills across the grade levels and tied to the Six-Traits language.
Six-Traits Professional Development
Most English/language arts textbook publishers are intentional about labeling their resources with the Six-Traits language. But too often, boxed curriculums lack the depth and intentionality that is required in order to fully implement the Six Traits.

In order to know how to launch and execute a fluid Six-Traits model that is responsive to student needs, teachers need the support of ongoing professional development. After all, most teachers didn’t learn how to teach writing in college, making vague guidance from the language arts textbook a recipe for shallow writing instruction. Using professional development as a catalyst to school-wide implementation of the Six Traits involves a continued cycle of professional learning, practice, and collaboration.
Six-Traits Professional Learning
Initial professional learning on the Six Traits should focus on building a shared understanding of not only the six words, but more importantly, what the traits look like in all genres and at each developmental level (i.e., pictorial writing in grades PK-1).
Chances are, teachers are already using the traits in one form or another. (Remember, the traits are inherent characteristics of good writing. Consequently, teachers are already targeting many of these individual writing skills. They just aren’t taking advantage of the power and prioritization that comes from grouping them by the six words.)
With this in mind, the first focus of professional learning is to identify what teachers already know about good writing and marry it with the Six-Traits framework. Teachers will be put at ease when they realize they don’t have to abandon all that they are already doing.
After a baseline understanding has been established for teachers, the next step is to reveal strategies for introducing the trait language to students. It’s important for teachers to learn classroom-tested techniques. This includes how to use characters, picture books, graphic icons, songs, or a combination of these tools to launch an intentional introduction of the Six Traits. This sets the stage for a yearlong sequence of trait-based writing lessons tied to different modes and genres.
Professional learning can occur in many forms. But the more frequent and firsthand learning teachers experience, the better the chances that the Six-Traits framework will be implemented school-wide. There are several ways to engage entire staffs with Six-Traits professional learning:
1. Get the ball rolling with a book study that examines the foundations of the Six-Traits framework. Great starter titles include Ruth Culham’s books, 6+1 Traits of Writing: Primary Grades, 6+1 Traits of Writing: Grades 3 and Up, and Traits of Writing: The Complete Guide for Middle School.

4. After teachers have embedded the Six Traits into their writing lessons, assignments, and assessments, engage teams in instructional rounds. This activity allows educators to observe their colleagues deliver trait-based instruction and then collaborate afterward to offer feedback and encouragement.
5. Use PLC time to examine how the Six Traits are being implemented and how learning is ultimately being impacted. As learning gaps are identified throughout the school year, use professional learning tools such as Smekens Education’s webPD. This will provide teachers with innovative strategies to address specific writing weaknesses.
6. Offer teachers ongoing implementation support with an instructional coach. Whether turning to a highly-trained in-house staff member or leaning on an outside expert like Smekens Education’s Remote Coach, this type of sustained guidance will help teachers maximize success with the Six Traits.
PART 8
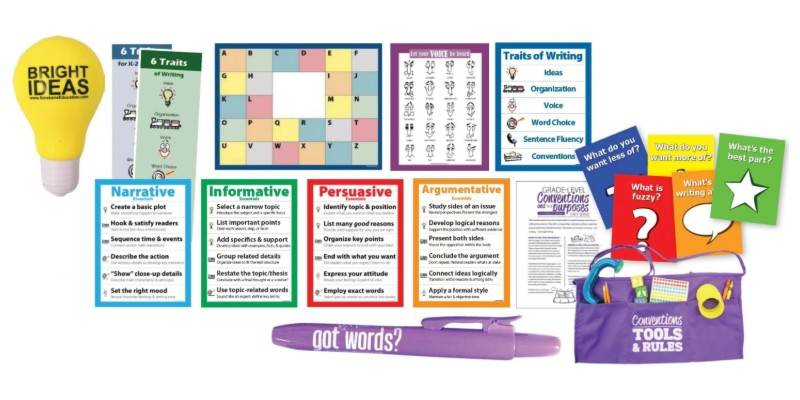
Acquire Six-Traits Tools & Resources
Identify your next steps
But we’ve only scratched the surface! If you want to continue learning about this powerful writing framework, consider these next steps:
View our Six-Traits on-demand workshops
Access free resources on the Learning Center
Final thoughts
Ready to Learn More?
Let’s connect to see how Six-Traits professional learning can improve achievement in your school.

